First off, let me say that I am NOT that great with Adobe Photoshop. I can get by, and I know how to do some things, but I’m strictly in the “amateur” category. And when it comes to photo processing in Photoshop, I’m even worse.
So I’m always excited when I find a new trick for improving or processing photos in Photoshop (since I’d never figure it out on my own). I think I found this one over at the Digital Photography School Blog.
Here’s the technique:
- In Photoshop, make a duplicate layer of your background (Layer > Duplicate Layer).
- Blur the duplicate layer a bit, just enough to blur out details, but not so much that everything becomes “blobs.” You’ll have to experiment yourself with how much blur to apply; sometimes you’ll use more, sometimes less. That’s what “Undo” and “Revert” are for, after all! I use the Gaussian Blur filter. (Filters > Blur > Gaussian Blur.)
- Open up the blurred layer’s blending options (Layer > Layer Style > Blending Options) and change it from the default blending mode of “Normal” to “Overlay.”
That’s it! (Note: the menu instructions I’ve given are for Adobe Photoshop CS2, so if you have a different version, your menus may be different.)
This technique increases contrast in the photo – or so I’m told, to me it seems to increase saturation a bit, too. In any case, it adds a very nice effect to the photo – almost a “glow” I’d say.
Here are some examples of what I’ve been able to do with this technique:
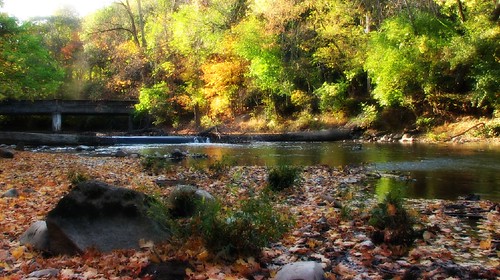
This photo looked rather dull until I applied this technique to it – then, suddenly, the trees were bright and the river was dark and the stones in the foreground became more… vivid, somehow. Unfortunately I didn’t save the original so I can’t show you a comparison.
But, I do have the original of another photo, so here’s a side-by-side comparison:
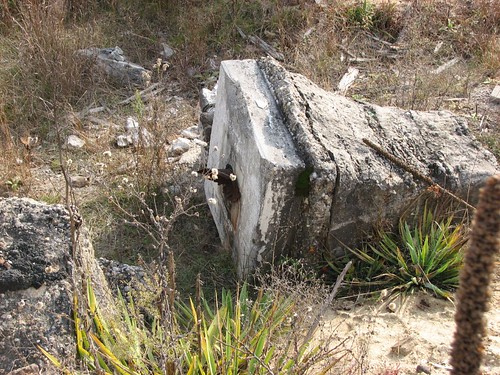
And here’s the exact same image after applying the technique I just described:

As you can see, the second image really just “pops” more than the first.
Now, this technique can’t be applied willy-nilly to any photo – it does tend to really darken the dark areas of your photos, so you lose some detail – you will have to experiment with your own photos and see what “works” for you. Eventually you’ll get to the point where you can “see” which photos might look better with this effect applied.
So there you have it. Hopefully you find this technique useful!
This trick has been around for quite awhile but it is always good to remind those that may have just started out with photoshop.
You can save yourself a small bit of time in step three. Simply change your layer to overlay rather than having to go into layer styles. Adjust your opacity to taste. Try some of the other layer modes as well. Overlay works most of the time but don’t forget those other ones. I use soft light alot to get the effects that I am after.
I will have to play around with the layer effects some more to see what I can do – thanks for the tip!
And I guess by “new” I meant “new to me.” 😉