I’m a sucker for certain “classic” photography effects. You’ve probably already seen the results of my obsession with the silky-waterfall effect and my experiments with macro mode, but there was another effect I have been trying to master – getting the “out-of-focus background” effect by controlling the depth of field.
For those that aren’t familiar with the term, “depth of field” refers to the amount of a picture that’s in focus. As usual, Wikipedia has an excellent article on the topic if you’re after more detail. The trick with cameras is that depth of field is controlled largely by the aperture you’re using when you take a picture. A larger aperture (smaller f-number) gives a shallower depth of field, and a smaller aperture (larger f-number) gives a greater depth of field. (Confusing, I know.) The theoretical “perfect” pinhole camera has an infinite depth of field, meaning everything is in focus no matter how far away, but in reality there is no such thing as a “perfect” camera, so every picture-taking device – including your own eyes – has some sort of depth of field, even if it’s very large.
Anyway, although you’d think that with photos you always want everything to be in focus, the fact is that you can use blurring to sort of “focus” on one thing – blurring out the background, for example, is often used with portraits to keep the focus on the person.
Now, knowing the relationship between aperture and f-numbers should let me create this effect whenever I want – in theory. In practice, I’ve had some trouble getting it “right.” Oh, I got some nice blurring when I used macro mode – which basically gives my camera a very, very, very small (shallow) depth of field, but it also meant that I could only focus on things very, very, very close to the camera. Useful for closeups of flowers – not so useful for anything else.
So the other day I sat down and decided to try some experiments. To gauge the results, I needed something that stretched away from the camera for some distance, so I could gauge what was in focus and what was out of focus.
Taking a tip from some photography sites which used a similar example, I set up my dining room table with a bunch of bottles of wine from my wine rack. This is what it looked like to start with:
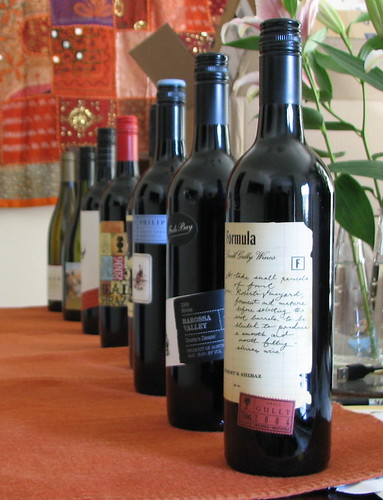
This was taken in manual mode on my camera, but I got the settings by using “Program” mode and just depressing the shutter button half-way so the camera gave me it’s “recommended” exposure settings. They are (for the curious): Exposure of 1/8 second, and aperture of f/2.7 (the largest aperture my camera has).
At first, I was a little disappointed – after all, the background is out of focus, but not by very much. The effect I wanted wasn’t very pronounced, and I knew it had to be possible – but what was I doing wrong?
Somewhere along the way (probably in The Digital Photography Book by Scott Kelby) I had read about portrait photographers using a “short zoom lens” (85-100mm focal range) because it produced such nice results for portraits – which, as I said earlier, often utilize a shallow depth of field to produce a blurred background that helps draw attention to the person in the picture.
“Well hey,” (I said to myself), “I’ve got a zoom lens on my camera that I think can do at least some of that focal range.” So I tried zooming in a little. The results? Have a look:
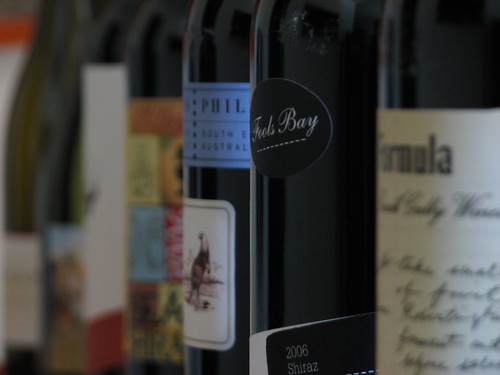
Well now – that’s much more like it! The bottles at the back are very much out of focus – more so than in the first picture. I might be onto something here!
Now, although the above picture turned out quite nice, I did make the mistake of letting the camera auto-focus for me – that’s why the “Fools Bay” botle is in focus instead of the first (closest) bottle. (My camera at the time was set to auto-focus on whatever was bracketed in the middle of the picture.) So, time to switch to manual focus!
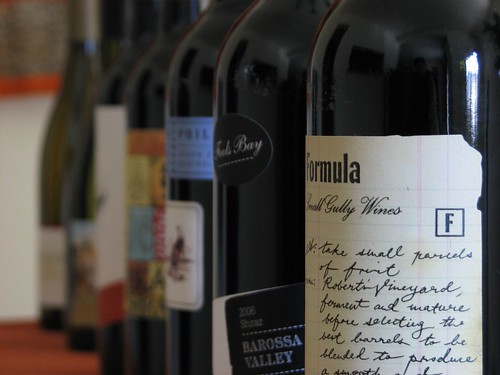
Ahhh, much better.
Now, it’s worth noting a few things about these last 2 photos:
- They were shot at f/3.5 – a smaller aperture than the original picture. Yet, there is (or appears to be, at least) more blur – this is counter-intuitive to what I thought I knew about aperture and depth of field.
- According to the EXIF data in the photos, the focal length was 23.8mm – nowhere near the 85-100mm I mentioned reading about for portraits (although this may simply be because the bottles were closer to me – and my camera – than a person would normally be when having their portrait taken).
Still, despite the somewhat counter-intuitive results, at least I know now what to do to produce this effect on-demand. (And now you do, too!)
So with all that, I lined up one last shot – the one I’m most proud of:

That was just what I had in mind when I set up the bottles on my table – and being able to actually produce it on my own was very satisfying. It’s little successes like this that make photography such an interesting and fun hobby!
So, now I know the tips to getting that nice blurred background effect:
- Set up your camera a bit further away from your subject
- Zoom in a little bit
- Use the largest aperture (smallest f-number) that you can at that level of zoom
- Don’t forget to make sure you’ve got the focus where you want it (i.e., watch out for auto-focus)
Yay! Another successful photography experiment.
I expect to be adding some filters (ND-grad and circular polarizing) to my collection soon – so we may have some experiments using those tools soon as well. Stay tuned!